How to Read and Interpret a Renovation Contract
/Knowing how to read a renovation contract and ensuring you have all of the details covered in that contract can make the difference between a successful renovation and one that falls short of your expectations. We deconstruct a typical renovation contract to help you understand what details should be included and how to interpret the contract you’re about to sign.
Prefer to listen?
Why did I write this blog post?
I want to start out by telling you what inspired me to write this particular blog post. We were hired by a paralegal to inspect a condominium for her client. The client had work done by another contractor, and the client considered the work to be substandard.
In order to know what we needed to inspect, I asked for a copy of the contract. The paralegal sent me the contract as well as a list of what the client considered deficiencies. In order to remain completely unbiased, we did not read the client’s list of deficiencies until after we had inspected the condominium. Only then did we read the list to ensure we didn’t miss anything.
What became glaringly obvious once we read the list of deficiencies that the client had compiled is that the client considered some things deficiencies that weren’t even part of the original contract. She assumed that certain items were to be completed as part of the project, but they hadn’t been specified in the contract. Consequently, the contractor was under no obligation to perform the tasks the client had expected. As this is an ongoing law suit, I cannot provide specific examples of this inspection, but we will talk about examples later in this post.
What this made me realize is that the client didn’t understand what was and wasn’t included in the contract. Because of her lack of experience with renovations, she didn’t know to ask exactly what would be done as part of each phase of the project. Although our contracts are very specific and don’t leave much room for speculation, most renovation contracts are somewhat vague. The one that we read for the inspection we did was not a bad contract. It was a typical, vague renovation contract. It’s suitable for most cases, except when there is a dispute.
After we finished this inspection, I realized how important it was to teach people how to read renovation contracts and ensure that everything they want to see done in their project is included in that contract in great detail. This was the inspiration for this blog post.
The Basics of a Renovation Contract
When we first started Multi-Trade Building Services over 30 years ago, a firm handshake and a verbal agreement were good enough. But times have changed, and for the past 20 years, we’ve been providing our clients with a very detailed and thorough contract that protects them and us. Contracts are legally binding documents and are essential for both parties to have a clear understanding of what is required of each of them.
To be perfectly clear, contracts are not just to make you, the client, feel secure in knowing what the contractor will be doing for your project. Contracts also make it very clear what your contractual obligations are. The contractor is expected to provide A, B, and C products and services for your renovation. But you are also expected to provide something to the contractor as part of that contract—the payment. Both parties have obligations to each other, and a contract provides the legally binding details of those obligations in writing.
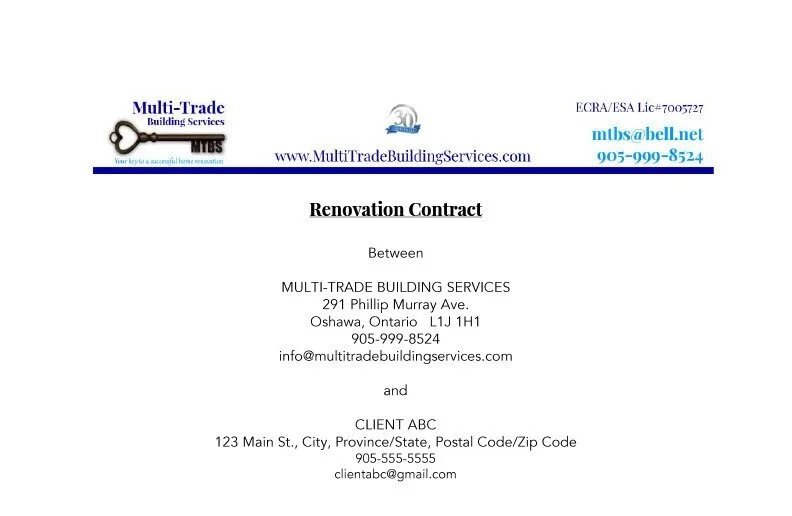
So let’s get started on the basics. I’m going to use a sample contract that we use at Multi Trade Building Services as a reference for the details in this post. It’s based on the Canada Mortgage and Housing Corporation’s suggestions for a renovation contract.
What’s on the First Page?
The first page should have the contact information of both parties to the contract. That means the legal names, addresses, and phone numbers, and we also include email addresses. Make sure your contractor knows what names should be on the contract. Some of our clients want two names on the contract, while others want only one person’s name on the contract. If two names are on the contract, ensure that both of you sign.
For the contractor, ask who has signing authority in the company. The owner will have signing authority, for sure, but if it’s a large enough company, there are often one or two other people who will have signing authority as well. Get a list of people who can sign documents, so if you have change orders during the project, you’ll know who can and cannot sign them.
Assumptions
We have a section that we include that’s called 'Assumptions'. These are assumptions that we make as part of the renovation quote. They will be specific to each project, but in general, they can be things like:
• All existing electrical within the home meets or exceeds Ontario Electrical Code standards.
• All existing plumbing within the home meets or exceeds the Ontario Building Code.
We include things like this because we sometimes come across incorrect, non-code-compliant plumbing or electrical work that was done by previous owners or a handyman. Whenever we find things like this, we always point them out to the homeowner, letting them know what the issue is and what it will cost to fix it. We make them aware that they are under no obligation to correct it. Whenever this happens (and it can happen during a project), our clients aren’t surprised because they knew our quote was based upon the electrical and plumbing meeting existing code requirements.
If this clause is not in your contract, you might want to ask your contractor what assumptions they are making about your home and the areas they are working in. This is particularly important if you live in an older home.
Selecting the right contractor for your project is essential. Read more about how to do that here: How to Select a Reputable Contractor
Description of Work
SAMPLE CONTRACT
The description of work should be next in your contract. This is the very detailed area that outlines exactly what you can expect from your contractor. In the scope of this blog, I can’t go into every detail of every possible scenario of a renovation project but I will cover some of the key areas.
Remove and Dispose
Most renovation projects have some element of demolition. Read this section of your contract carefully. Make sure that the items being removed should be removed. Also ensure that it stipulates "Remove and dispose" if you are expecting your contractor to dispose of the debris.
Some of our clients want to save money and therefore will dispose of the items themselves. Make sure that is reflected in the contract.
Also, you should find out if your contractor puts a disposal bin in your driveway or if they haul the garbage away in some other fashion. Will the garbage be left on site for several days, and if so, where will it be left? If a bin is put on site, will there be room for you to park your car(s) in the driveway? How long will the bin be there? These are essential questions that you need to know the answers to.
Supply and Install
When listing the details of your project, be aware of which bullet points specify "Supply and install" and which say "Install client-supplied" or just "Install". If it just says 'Install', then it isn’t clear who is doing the 'supply' part. This is critical to know because if you are expected to supply a lot of items, such as tubs, vanities, etc., it can add a lot of additional costs to the project that you weren’t aware of.
If your contractor is supplying the fixtures, make sure it specifies the make, model, style, and colour of the fixture. If your contract just says, "Supply and install kitchen faucet", you could end up with a builder's-grade faucet in your kitchen. But if the contract says, "Supply and install MOEN Camerist Single-Handle Pull-Out Sprayer Kitchen Faucet with Power Clean in Chrome," then you know exactly what you are getting and have a legitimate claim if you don’t get it.
Execute Repairs
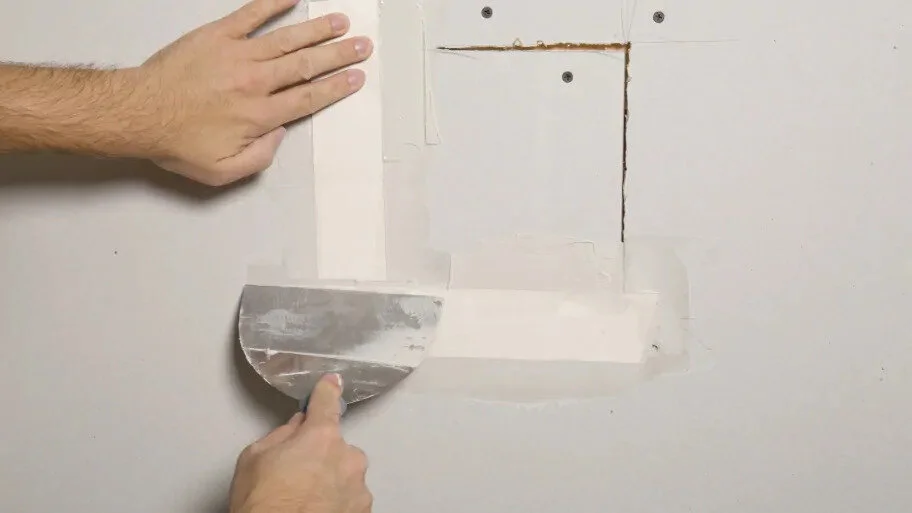
Make sure your description of work includes a statement about where repairs will be required. We gained a new client when they had a bathtub wrap company come in to put a unit over top of their existing bathtub. Because drywall had to be removed, the clients were left with a ton of drywall repair that was now required. Nothing was in the contract about any drywall repair. The clients were shocked! Now they had to find another contractor who could do the drywall repair in their bathroom.
Here are some typical tasks that would require drywall repair that you might not think about: a bulkhead removed above kitchen cabinets or bathtubs; a one-piece unit removed from a tub or shower area; a countertop removed that had a backsplash and/or sidesplash; and a tiled backsplash removed from a kitchen. Think about the steps of your project and make sure you are covered for repairs. If you’re uncertain about the steps of your project, ask your contractor to go through the process with you.
Concrete Board
Make sure the supply and installation of concrete board (or equivalent) is included if you are having tiling done in a wet area such as a shower or bathtub. Many years ago (15–30), it was code to just put 'green board' or drywall inside of tubs and showers. That’s why we're getting so many calls to gut showers or tubs and re-tile. The slightest crack in grout or tile can cause water damage if there’s no concrete board behind the tiles. Make sure your contractor specifies that they are using a type of concrete board in wet areas.
Painting and Trim
Our contracts typically read, "Supply and apply one coat of primer and two coats of paint to walls, ceiling, trim, and doors". I’d always thought that was pretty detailed. It specifies we will be using primer, and you will get two coats of paint on the surfaces listed. However, a recent conversation with a new client made me realize that I need to be more specific.
It’s an accepted norm in the industry that small nail holes will be filled and sanded prior to priming and painting. That means that where you had artwork and photos hung, those nail holes will be filled. However, our client wanted to have all of the walls skimmed. Her home was old and had years and years of poor paint jobs that had left the walls looking a little rough from the lint on the rollers, incorrect rollers being used, and paint drips. That type of work is considered drywall repair and does not fall under the scope of painting.
I was so glad we had the conversation before a contract was signed because clearly the client had different expectations than what is the norm in the industry. Because the contract didn’t specify any skimming of the walls, we wouldn’t have done that work, and she wouldn’t have gotten the job completed the way she wanted. I revised my quote and the contract to reflect her preference.
I also ran into a challenge about 15 years ago when we were doing a whole house renovation. We have our own team of full-time employees who do all the work on site. However, because this job was so extensive and came with a tight deadline, I hired a subcontractor carpenter, whom we occasionally used at the time, to install all of the baseboard, casing, and crown molding throughout the home.
When he was done, he asked me to inspect his work and then write him a cheque. I was mortified to see that he didn’t fill any nail holes or caulk the trim anywhere. When I asked him about this, his response was, "That’s the job of the painter." If you are hiring your own painter, make sure it’s very clear who’s doing what because a simple task like filling nail holes and caulking trim (which can take a long time for a whole house) can go undone if it’s not in the contract.
Payment Schedule
SAMPLE PAYMENT SCHEDULE
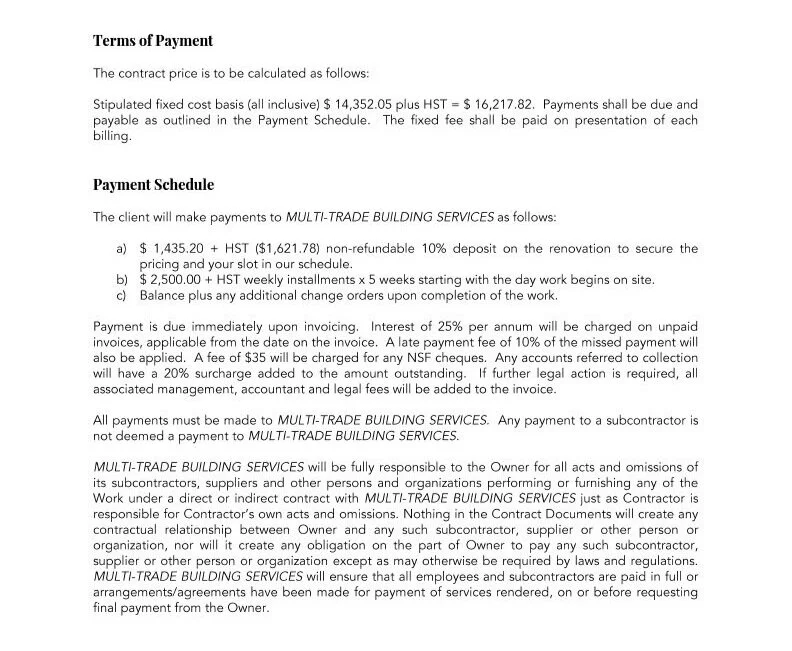
There are many other areas I could talk about when it comes to a renovation contract, but from this point on, they are each going to be very specific to the contractor. However, I do want to touch on the Payment Schedule because, aside from the Description of the Work, it’s the second-most important section of the contract.
Make sure the total cost of the contract is listed at the top of the Payment Schedule. Your schedule should indicate what deposit is required and when the next payment is due. The best contract to protect you and the contractor will ask for a 10%–20% non-refundable deposit when the contract is signed. This guarantees your prices and gets you on the schedule. A contractor should never ask for 50% at the time of signing unless they will be starting your project within a week and they need that money to buy materials.
If your project is more than 3 weeks long, your payment schedule should ask for weekly installments or milestone payments. This will spread out your payments over the project, ensuring you haven’t paid your contractor for more work than he has completed.
Be prepared that if custom cabinets are being made, you will likely be asked for 50% of the cost of the cabinets in order to start production. This is normal; be prepared to pay. You will usually be asked for this payment once the measurements have been taken and final decisions have been made on your door style, etc. You may also be asked for the remaining 50% the day prior to the cabinets being installed. This is also normal, as once they are installed in your home, they are your property, and the contractor will have a tough time coming after you if you don’t pay. It’s not like he can come back and remove them!
If the contractor is doing a large project and won’t be starting for a few weeks at least, please don’t agree to pay more than 20% as a non-refundable down payment. It’s acceptable for a contractor to ask for another draw one week prior to starting, as he will have to order materials and shouldn’t be out of pocket for those materials. If your contractor has a different payment schedule than what I’ve discussed above, then please make sure you are comfortable with the terms before you sign the contract.
There is so much more that I could discuss about renovation contracts. However, I don’t want to keep you reading here for hours on end. Click on the image above offering a free download to get a thorough report that will go through a complete renovation contract and outline details not covered in this blog post.


